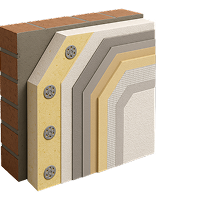

The ETICS (External Thermal Insulation Composite System), or seamless thermal insulation system (BSO), is a proven method of thermal insulation for external walls. It involves fixing thermal insulation material, such as EUROPIR® PIR boards, and applying a reinforcing layer and thin-layer plaster, which ensures excellent insulation, durability and aesthetics of the façade.
The installation process for EUROPIR® boards is no different from that for other traditional insulation materials. In this EUROPIR® board installation guide, you will find practical tips for each stage of the work – from preparing the substrate, through cutting and gluing the boards, to the final finishing of the façade. With these tips, you will achieve maximum thermal efficiency and protection against energy loss.
System components

1. Adhesive and levelling mortar
Mortar for bonding insulation boards to the substrate and embedding fibreglass mesh.
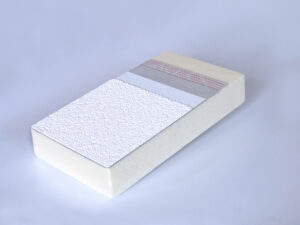
2. EUROPIR® ETICS
Thermal insulation PIR board without cladding with a thermal conductivity coefficient of 0.023–0.025 W/m∙K.
3. Mechanical connector
Mechanical connectors in accordance with the approval.
4. EUROPIR® CAPS/ EUROPIR® TUBE
PIR foam caps for insulating mechanical connector plates.
5. Fibreglass mesh
Mesh with a density of 145 g/m², mesh size 4.0 x 4.5 mm (+/- 0.5 mm), or with a density of 160 g/m², mesh size 3.5 x 3.8 mm (+/- 0.5 mm).
6. Soil
Primer for preparing the substrate.
7. Thin-layer plaster
A compound designed for applying thin-layer plaster coatings resistant to dirt, mould and fungi on the exterior of buildings and finishing layers in ETICS thermal insulation systems.
Installation instructions for EUROPIR® thermal insulation boards
Installation instructions:
The installation of the insulation system begins with the installation of starter profiles, which are the basic element ensuring the stability and strength of the entire structure. Starter profiles, both aluminium and PVC, have a protective function and support the proper drainage of water from the façade, which prevents mechanical damage and moisture penetration under the insulation. In addition, the lower part of the insulation system also consists of fire barriers that prevent the spread of fire along the façade. They are also crucial for the aesthetics of the finish, ensuring an even and durable edge.
Preparation of boards before applying adhesive and levelling mortar:
Before applying the mortar, the boards must be thoroughly checked for defects and damage. Damaged boards must not be used in the system. Before applying the adhesive and levelling mortar, the boards must be cleaned of any dust that has accumulated during cutting or transport. Dust can be removed with a brush, by gently tapping the board against a hard surface or using compressed air.
Insulation boards must be protected from sunlight throughout the entire duration of the insulation work. Boards that have undergone significant colour changes due to UV radiation must be sanded before installation in the system.
Cutting the boards:
The lack of cladding on the insulation boards makes them particularly easy to work with, adjust the thermal insulation and install quickly and easily without the need for specialised equipment. The boards can be cut using a hand saw or knife. Cuts in holes and corners should be made with an appropriate margin. Once the adhesive has dried, the boards can be further cut or sanded to achieve the desired shape and an even surface. It is important that the cuts comply with the required dimensions. Insulation boards must not be cut with a resistance wire.
Bonding insulation boards:
Apply the adhesive mortar to the board using the following method:


Perimeter-point method, according to which the adhesive mortar should be applied in strips 4-6 cm wide around the edges of the boards, leaving gaps in the adhesive strip for ventilation, and on the remaining surface of the board in several spots (3 to 8) with a diameter of approx. 8 cm. The total adhesive area should cover at least 40% of the panel surface.
Comb method, which is used on flat surfaces with a maximum deviation of up to 5 mm. The mortar is applied with a notched trowel with teeth measuring 12 x 12 mm – 15 x 15 mm over the entire surface of the board.
After applying the mortar to the board, in accordance with the requirements for the type of substrate, the boards should be pressed against the wall from bottom to top. The boards should be installed edge to edge, and excess mortar from the edges must be thoroughly removed. In the case of the plinth part of the building, the boards are usually glued in the opposite direction – from top to bottom.
Spaces between boards wider than 3 mm should be filled with low-expansion polyurethane foam.
Installation of panels in corners
When installing EUROPIR boards in corners, they should be laid in rows with a butt joint, which will ensure continuity of insulation and stability of the structure. It is recommended that the boards be glued with a small overlap in relation to the end edge of the corner. After the adhesive and filler mortar has hardened, carefully trim the overlap to an even line and sand if necessary.

Installation of boards in window openings
When installing EUROPIR insulation boards near openings, place the boards so that the joints do not fall in the corners of the openings. The minimum distance between the joints and the corners of the openings should be at least 100 mm.

Fastening with mechanical connectors
Mechanical anchoring of insulation boards ensures the stability of the system against wind suction forces. The number and placement of mechanical fasteners depends on factors such as the height of the building, its shape, location, wind zone and substrate quality. Substrate quality is determined by an pull-out test. Fasteners are installed after the adhesive and levelling compound has hardened, usually after 2-4 days, depending on climatic conditions. The consumption of mechanical fasteners, amounting to 4-8 pieces/m², is determined by the anchoring plan, which should be prepared by an authorised person based on the specific characteristics of the structure. Before calculating, it is recommended to perform a pull-out test.
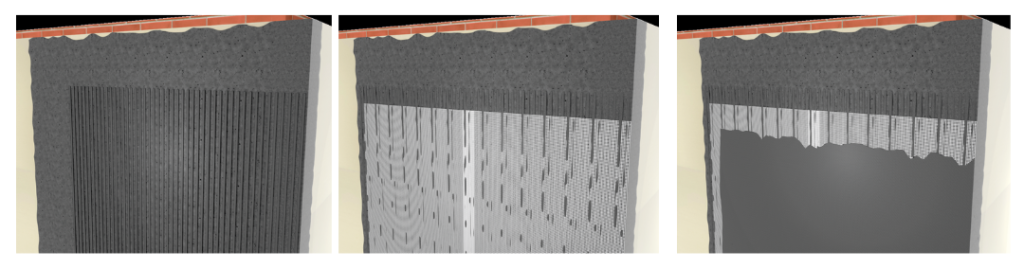
Securing mechanical fastener plates
The fasteners must be securely fixed. After drilling the hole, mill a socket for fixing the EUROPIR® CAPS cap, which improves the tightness of the thermal insulation, reduces the risk of thermal bridges and eliminates the ladybird effect.


Facade with correctly secured mechanical connector plate
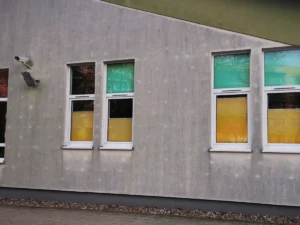
Facade where no plugs were used to insulate mechanical connector plates
Read more about the ladybird effect
Installation of the reinforcement layer
Spreading adhesive and levelling compound:
Apply the mortar to the entire surface using a 10 x 10 mm notched trowel. Gently press the fibreglass mesh into the mortar, ensuring an overlap of at least 100 mm at the joints. The mesh should be laid vertically, ensuring even coverage across the entire surface.
Levelling the reinforcement layer:
The reinforcement layer should be levelled by spreading the extruded mortar on the mesh and adding mortar as needed. The reinforcement layer should be at least 4 mm thick, and the mesh should be applied over the entire surface. The mesh in the reinforcement layer should be laid without folds, ensuring adequate coverage over the entire surface.
Finishing layer
The type, structure and shade of the finishing layer, consisting of primer and plaster, is specified in the construction documentation. Thin-layer plasters supplied in buckets are ready for direct application. The method of preparation and application of primers and plaster compounds is specified in the technical data sheets for these products (ETICS documentation). No additives may be added to these products. The type of plaster compound used must correspond to the type of substrate used.
Completion of work
The coating must be protected from rain, frost, strong wind and direct sunlight for at least 72 hours during the curing period. Failure to do so may result in colour differences on the façade due to different crystallisation rates of the silicate binder.


 4 Sienkiewicza Street, Brzeg Dolny
  +48 71 794 33 40
  ask.therm@pcc.eu